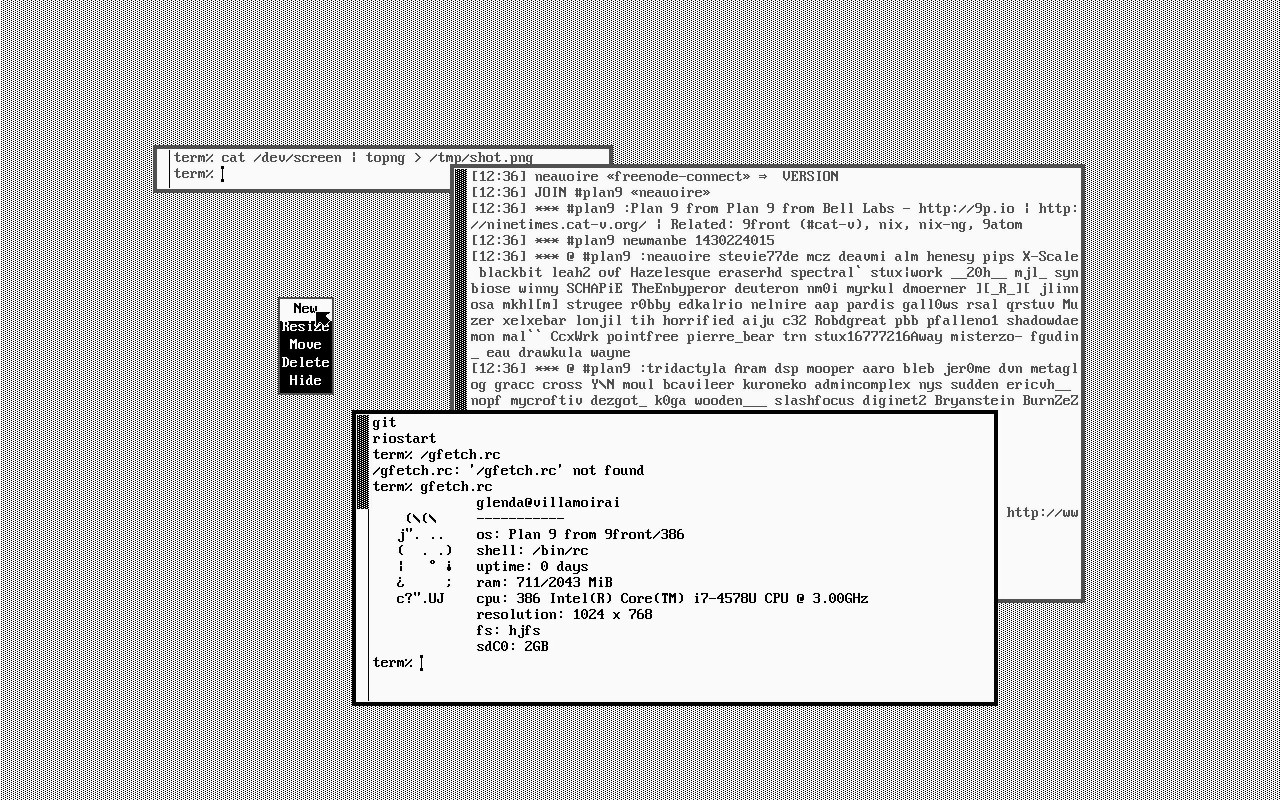
Notes on the Plan9 interface and tools.
Rio is the name of the windowing system of the Plan9 operating system. To draw a new window on the screen you can right-click on an empty spot on the desktop and choose New You will see that the mouse cursor changes to a plus.
Moving windows around doesn't work like with other systems. Since there's no window title bar at the top, you can't left-click and drag it around. Instead, you can right-click and drag using the border of the window. The mouse cursor turns into a box shape in the process. Alternatively, there is a Move option when you right-click on the desktop that allows you to right-click and drag anywhere on a window to move it around.

Shortcuts
ctrl+f | Auto-complete filename |
|---|---|
ctrl+a | Go to beginning of line |
ctrl+e | Go to end of line |
ctrl+" | Repeat last command |
Useful Commands
If you press esc, Rio will be in hold mode, in this mode commands will only be sent when leaving hold mode, allowing to send multiple lines at once.
fshalt | Always stop file system before power down. |
|---|---|
fshalt -r | Stop file system and reboot. |
usbfat: | Mount USB stick. |
usbeject | Unmount USB stick. |
Screencapture
Sometimes it can be useful to record what's on your screen. For example, you can use screen shots for documentation. Also, providing a view of an error can help others to diagnose the problem. You can take a shot of the whole screen quite easily in a raw image format like this.
cat /dev/screen | topng > screen.png | To capture the entire screen |
|---|---|
cat /dev/window | topng > window.png | To capture only the current window |
Mods
Whenever you make changes to the rio source files, you can recompile it with the following code, note that if you are using an Intel386 device, you will get 8.out.
mk # Will create a 5.out file
5.out # To launch rio, test changes
mv 5.out /bin/rio # Manually install changes
mk install & mk clean # Automatically install changes
Wallpaper Support
To add wallpaper support to Rio, you want to edit the rio file /sys/src/cmd/rio/data.c, within the iconinit function, you can draw a graphic to the background image by adding the following code. In this example, the graphic is stored at the location defined with open(), feel free to change it.
int fd;
Image *bimg = nil;
fd = open("/usr/glenda/lib/wallpaper", OREAD);
if(fd >= 0){
	bimg = readimage(display, fd, 0);
	close(fd);
}
if(bimg){
	background = allocimage(display, Rect(0, 0, Dx(bimg->r), Dy(bimg->r)), RGB24, 1, 0x000000FF);
	draw(background, background->r, bimg, 0, bimg->r.min);
}
else
	fprint(2, "iconinit: %r\n");
The file format should be in Plan 9's native raw file format, to convert any jpg into this format, use:
jpg -9t wallpaper.jpg > wallpaper
Rio Theme
My current theme for rio can be installed by modifying the /sys/src/cmd/rio/wind.c file and adding the following lines in the wmk function:
if(cols[0] == nil){
	grey = allocimage(display, Rect(0,0,1,1), CMAP8, 1, 0x555555FF);
	darkgrey = allocimage(display, Rect(0,0,1,1), CMAP8, 1, 0x333333FF);
	cols[BACK] = display->white;
	cols[HIGH] = allocimage(display, Rect(0,0,1,1), screen->chan, 1, 0x72DEC2FF);
	/* halftone */
	cols[BORD] = allocimage(display, Rect(0,0,2,2), CMAP8, 1, 0x000000FF);
	draw(cols[BORD], Rect(1,1,2,2), display->white, nil, ZP);
	draw(cols[BORD], Rect(0,0,1,1), display->white, nil, ZP);
	cols[TEXT] = display->black;
	cols[HTEXT] = display->white;
	titlecol = allocimage(display, Rect(0,0,1,1), CMAP8, 1, 0x000000FF);
	lighttitlecol = allocimage(display, Rect(0,0,1,1), CMAP8, 1, 0x000000FF);
	holdcol = allocimage(display, Rect(0,0,1,1), screen->chan, 1, 0x72DEC2FF);
	lightholdcol = allocimage(display, Rect(0,0,1,1), CMAP8, 1, 0xCCCCCCFF);
	paleholdcol = allocimage(display, Rect(0,0,1,1), CMAP8, 1, 0x888888FF);
}
I don't like that the scrollbar touches the side of the window, to fix that, you can modify the wscrdraw function in the /sys/src/cmd/rio/scrl.c file, and change the following lines:
if(!eqrect(r2, w->lastsr)){
	w->lastsr = r2;
	/* move r1, r2 to (0,0) to avoid clipping */
	r2 = rectsubpt(r2, r1.min);
	r1 = rectsubpt(r1, r1.min);
	draw(b, r1, w->cols[BORD], nil, ZP);
	r2.max.x = r2.max.x+1;
	draw(b, r2, w->cols[TEXT], nil, ZP);
	r2.min.x = r2.max.x-1;
	draw(b, r2, w->cols[BORD], nil, ZP);
	draw(w->i, r, b, nil, Pt(0, r1.min.y));
}
Open window with position
echo new -dx 400 -dy 200 -cd /sys/src/cmd acme > /dev/wctl

incoming: plan9